Migrating my home network to a new subnet
It's tricky to migrate a network from one subnet to another. Here's the process I took to successfully migrate, including Proxmox, LXCs, VMs, NAS, proxies, and other devices.

Since I started my home network, it has been on the default 192.168.1.x/24 subnet. This generally hasn't been an issue, since the VPNs I have been connecting to for various jobs have fortunately been on other IP ranges, until recently when I needed to connect to a 192.168.1.x range and discovered the problems of IP conflicts.
This prompted me to move subnets to a different range, taking into consideration my NAS, my Proxmox host and hosted LXCs and VMs, proxies, switches, and devices with static IPs. One wrong move, and it could cut me off from the tools needed to go back.
Expand the subnet mask
The first thing that I could do that was non-destructive was to start expanding the subnet mask to encompass everything between 192.168.0.1 and 192.168.254.254 (in other words go from /24 to /16).
I'm using Unifi, so this is pretty straightforward. I'm currently running a Unifi Security Gateway (USG), so in the controller UI, I just go to the Network setting, click into the Default network (I don't have any VLANs configured, so there is only one). From there I can change the Gateway Netmask to 16. I also uncheck Auto-Scale Network as I want to DHCP to use the specific destination IP range, and I can configure that further down.

The only change this will cause is to update any DHCP clients to update the subnet mask value to 255.255.0.0, meaning they are now able to communicate with any other device anywhere on the 192.168.x.x sub-network.
Under the DHCP setting on the same page, I can now specify the range I want to use, in this case, I will be assigning IPs to certain devices manually, so I don't need many for the rest, so I start at 200 to 254 (which provides 55 assignable IPs).

Now, a device can have any IP in the /16 range and still be able to communicate with other devices, as well as the gateway (which is still at 192.168.1.1 for now).
It is probably a good idea to set the DHCP lease time to a low value while doing the migration, so that devices get their new IPs quickly. I set it to 300 seconds (5 minutes.)
Manually Assign IPs
The devices that you don't need to assign an IP for can update themselves at the next IP lease renewal. They will get a new IP in the 192.168.142.x range (above 200).
Some devices will need a static IP though, such as any proxy servers, or anything else that might be "hard-coded" to an IP.
When it comes to LXCs and VPNs in Proxmox, you can configure the network to accept a DHCP IP, or you can set it manually. As I'm still very much a learner when it comes to Proxmox, I went with a "belt-and-suspenders" approach and changed both the LXC configuration, and assigned a fixed IP in the Unifi controller for the services that had to keep a specific IP. My test service was the webserver for this site. It is a dedicated LXC for running Ghost, and since the site is still in its infancy, was a low risk if it all went wrong.
First in the network controller, I assigned a fixed IP in the 192.168.142.x range. Because I am sometimes a little too detail-oriented, I decided to use the Proxmox container IDs as the last octet. So container 100 would get IP 192.168.142.100 and so on. From the client list, click on the relevant client to bring up the inspection panel, and then click on the gear. Under IP Settings, check "Fixed IP Address" and enter the relevant IP number, then apply:
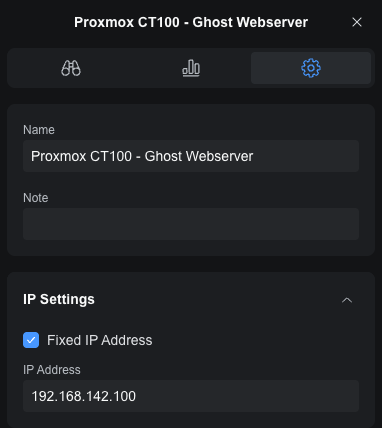
You don't have to put a name in, but as I said, I'm too detail-oriented.
The IP won't be applied immediately, as it wait for the DHCP lease to expire (the configuration of which I won't go into here). You might see a warning under the IP field:
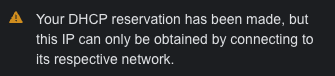
Once the device reconnects with the network, it will get updated and the warning will disappear.
You can stop here, or you can add the "suspenders" part, by assigning the IP in Proxmox.
The process is different for VMs and LXCs, as VMs have their own network stack, whereas the LXC shares the network stack with the Proxmox host.
To set a static IP for an LXC, go to the container entry and select the “Network” panel.
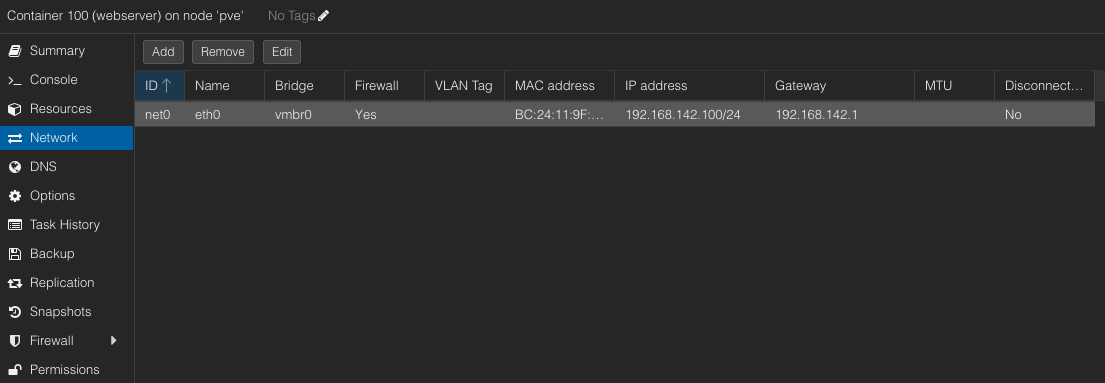
Here you can select the line and “Edit” it.
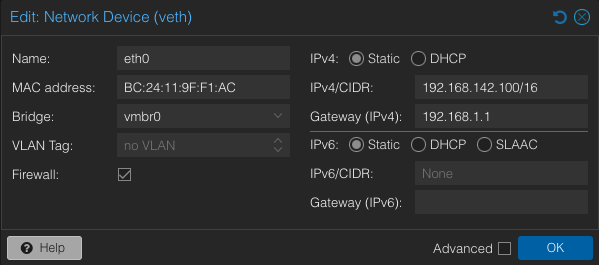
Switch to Static, and enter the relevant new IP (making sure it matches with whatever you put in the network controller) with /16 at the end. This is important as it allows the device to communicate with other devices that haven’t migrated to the new IP range, including your gateway. If it's not specified, it can be a good idea to put the Gateway IP here as well, unless this device definitely doesn't need to leave the local network.
You can now force the IP to update by going into the console and cycling the DHCP client. On Debian based systems this is dhclient -r to clear the current config, and then dhclient to request a new lease. Your IP should now be updated. You can check this by typing ip a to get the current IP.
# dhclient -r
# dhclient
# ip a
1: lo: <LOOPBACK,UP,LOWER_UP> mtu 65536 qdisc noqueue state UNKNOWN group default qlen 1000
    link/loopback 00:00:00:00:00:00 brd 00:00:00:00:00:00
    inet 127.0.0.1/8 scope host lo
       valid_lft forever preferred_lft forever
    inet6 ::1/128 scope host noprefixroute
       valid_lft forever preferred_lft forever
2: eth0@if18: <BROADCAST,MULTICAST,UP,LOWER_UP> mtu 1500 qdisc noqueue state UP group default qlen 1000
    link/ether bc:24:11:9f:xx:xx brd ff:ff:ff:ff:ff:ff link-netnsid 0
    inet 192.168.142.100/16 brd 192.168.142.255 scope global dynamic eth0
       valid_lft 59sec preferred_lft 59sec
    inet6 fe80::be24:11ff:fe9f:xxxx/64 scope link
       valid_lft forever preferred_lft forever
#
Now you can go through each device that should have a specific IP, and assign it.
Note that if the device is referenced from somewhere else, this will break that connection - this includes Reverse Proxies, NAS, and port forwarding.
Special Cases
Port Forwarding with NGINX
In my case, I port forward my external IP to my NGINX reverse proxy, which then takes care of the rest. I like the NGINX Proxy Manager (NPM, not to be confused this with the Node Package Manager), and this is running in an LXC, so as soon as I changed the IP on that LXC, I needed to update Port Forwarding in the network controller.
In the Unifi USG controller, this is in Settings > Security > Port Forwarding:
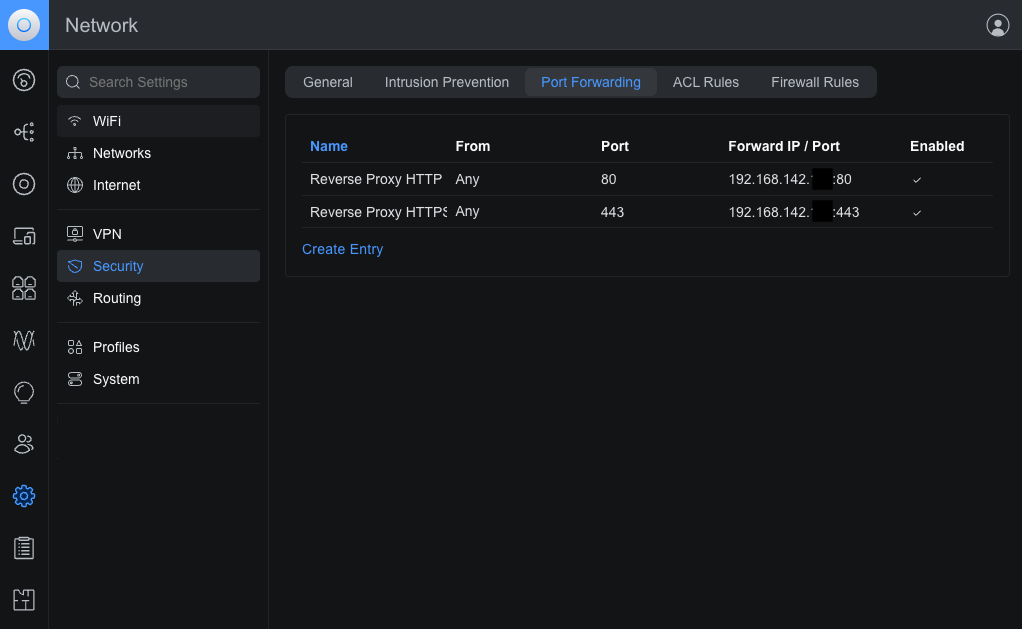
This routes external traffic to the reverse proxy, but remember that the IP numbers configured there will need to be changed to the new device IPs as well, otherwise you will see "502 Bad Gateway" errors or just get timeouts.
Reverse Proxies with NGINX Proxy Manager (NPM)
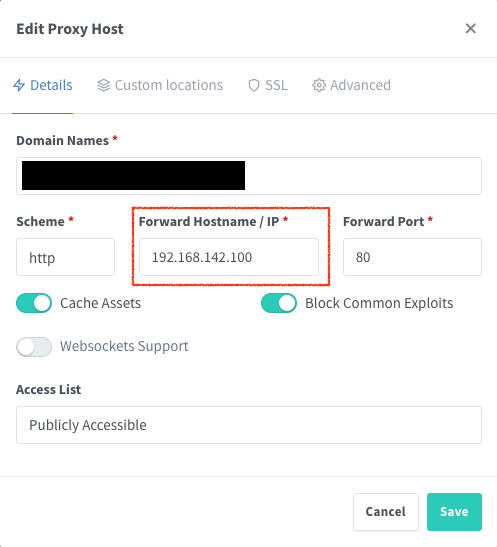
In the case of this site, I had to change it in multiple places, due to how ghost works with ActivityPub. First on the details panel:
Then in the Custom locations panel:
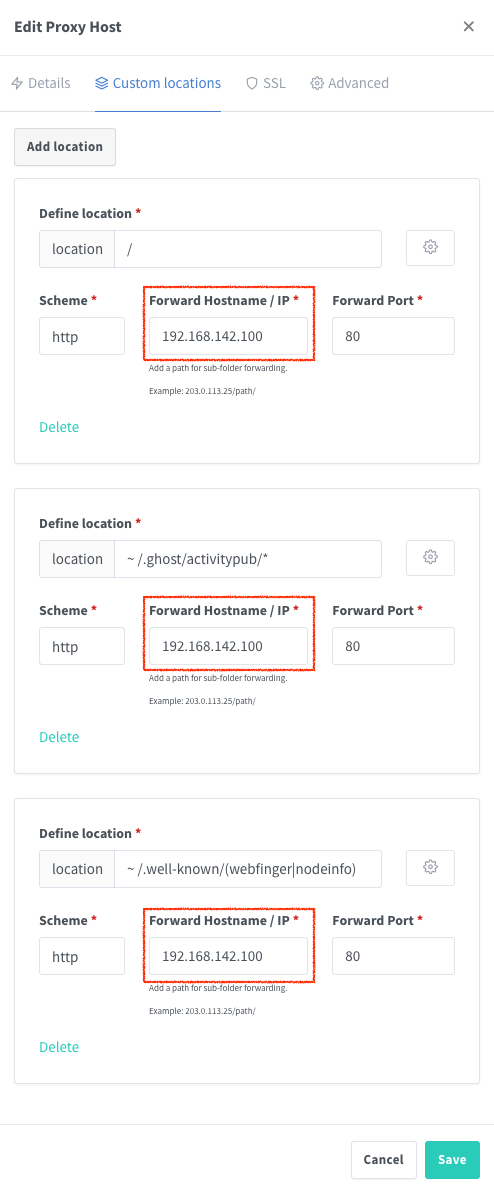
Make sure you update the reverse proxy configuration for each device it serves, as you change the IP.
NAS - QNAP
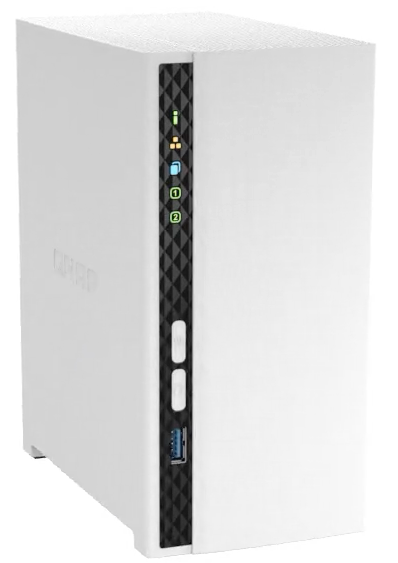
I have a QNAP TS-233 running as a RAID 1 with 2x 4TB HDDs. This is used for storing photos, media, and Proxmox backups. Since I need to mount the NFS volumes, it needs to have a static IP, which means that if the IP changes, there is a ripple effect where configuration has to change in many other places.
For this reason, the NAS, the Gateway, and my Proxmox host were the last devices I changed, as they were the highest impact if something went wrong, so I needed to have no time pressure and not rush things.
To explain what needed to change, it's probably easier to explain how it's all set up in the first place.
Connecting an LXC to a NFS (Network File Storage) on a QNAP NAS
To expose the NAS volumes to the LXCs I use for media (Jellyfin) and photos (Photoprism), I needed to mount them in the Proxmox host first, and then mount them as volumes in each LXC.
The volumes are created by using the shared folder feature in the QNAP Control Panel. (Note: not File Station and not Storage & Snapshots)
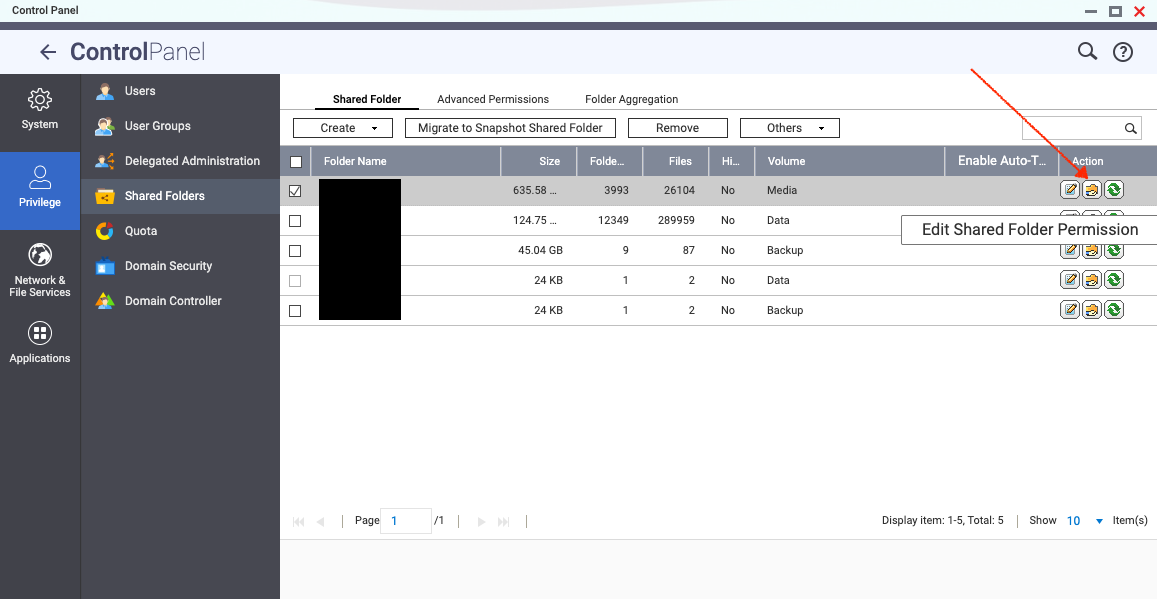
We want to edit the Shared Folder Permission by clicking on the little icon the arrow is pointing to, which will invoke this dialog:
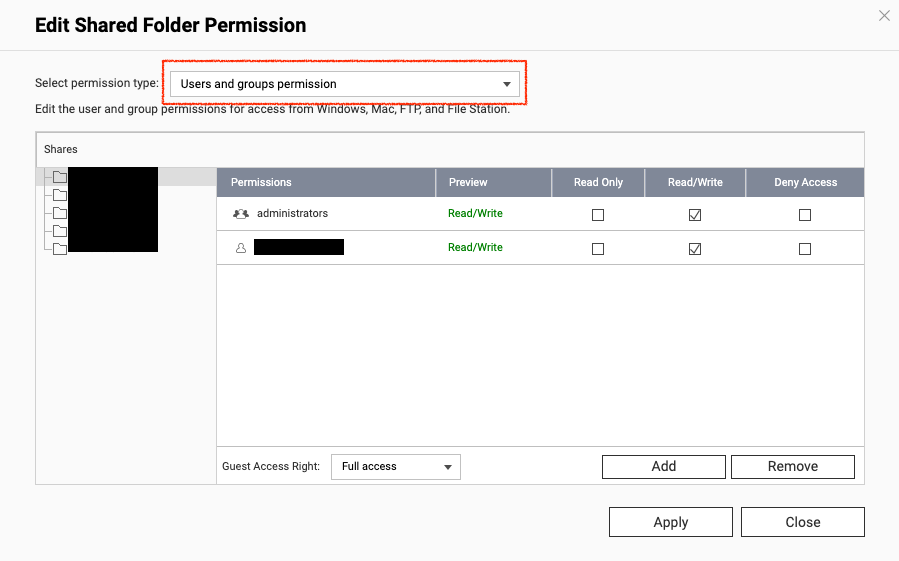
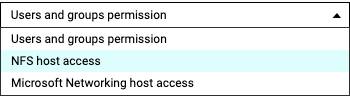
It’s not obvious, but there is a drop-down menu here that hides the important configuration needed. We aren’t particularly worried about the permissions on this page. Instead, click the drop-down and go to NFS Host Access:
Which will finally bring you here:
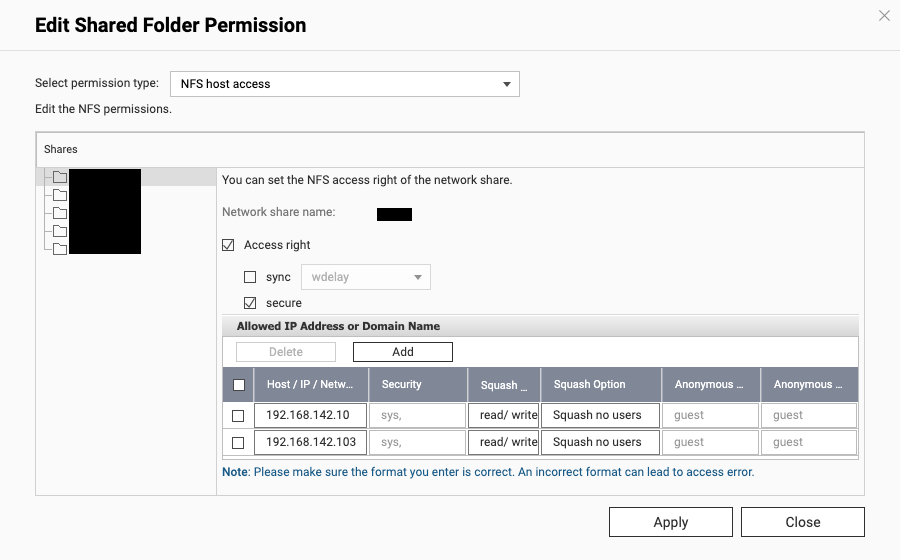
Here, you need to enter the IP addresses of all the devices are are allowed to mount the particular shared folder as an NFS volume. Depending on what you want to do, you may need to change the Squash Option to Squash root user only for security, but Squash no users works for me for now.
Squash no users means that the remote users will retain their original UIDs, which could be a security risk. Squash root user only means that the remote root user is mapped to nobody on the NFS, but all other users retain their UIDs. I have included the IP of my Proxmox host, as well as a container, as this is a media folder, so I want my media server to be able to mount the drive, and I need Proxmox to be able to mount it as well. Before I changed the subnet, these were mapped to the 192.168.1.0/24 subnet, so I wasn't able to mount them afterwards. Changing the values to the .142 subnet fixed the access issue.
This needs to be done for each shared folder that you want to mount.
Change the Gateway IP / Subnet range
Now all the devices are on the new subnet, the reverse proxy is updated, and the NFS drives have permissions mapped. After checking that all the clients on the network have a .142 IP, we can change the gateway IP, and reduce the range back to /24 again.

This is easily done back in the Unifi Controller Settings for the network that we started with. This is a pretty quick and painless change, which is a nice way to end the migration.
The more observant reader will notice that the UI looks a little different here - this is because this screenshot was taken after I exchanged my network controller in an LXC for the one in a new Unifi Cloud Gateway appliance. I'll have more on this change in another post.
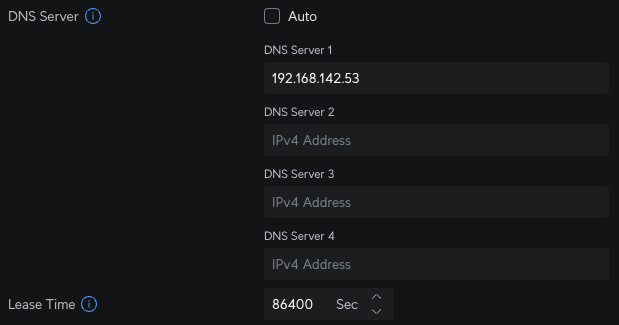
Further down the page, I set the DNS server to my AdGuard IP - this means that devices that get an IP from this DHCP server, will use the AdGuard DNS by default.
I also set the lease time back up to 86400 seconds (24 hours) to reduce DHCP traffic - I could set this even longer as I don't expect any changes, but while I tweak the settings for a bit, 24 hours is long enough for now.
Conclusion
We only moved from 192.168.1.0/24 to 192.168.142.0/24, but moving to a completely different IP range like 10.42.69.0/24 or 172.16.99.0/24 will probably need to utilise static routes, more advanced routing, and more planning to minimise downtime.
And that's the key message here – by doing some planning in advance and thinking through the changes before actually changing anything, it's possible to change your subnet with minimal downtime.